
Capture, Record, Edit and Share — All From Your Browser with ScreenLaps
 ScreenLaps Team9 min read
ScreenLaps is two tools working as one: a lightweight browser extension that captures screenshots and records your screen, and a cloud dashboard that stores, organizes, edits, and shares everything you capture. You never leave the browser — grab a screenshot, trim a recording, blur something sensitive, and hand a colleague a shareable link, all in one place.
This guide walks through the entire platform: how to get started, every feature of the extension, and every feature of the dashboard.
#1. ScreenLaps Overview
Getting up and running takes four steps:
- Install the ScreenLaps browser extension from your browser's extension store.
- Register an account at screenlaps.com.
- Connect the extension to your account. The very first time you open the extension after installing it, the popup shows a single Login button — nothing else. Click it, sign in with the account you just created, and the extension links to your dashboard.
- Start using ScreenLaps — capture, record, organize, edit, and share.
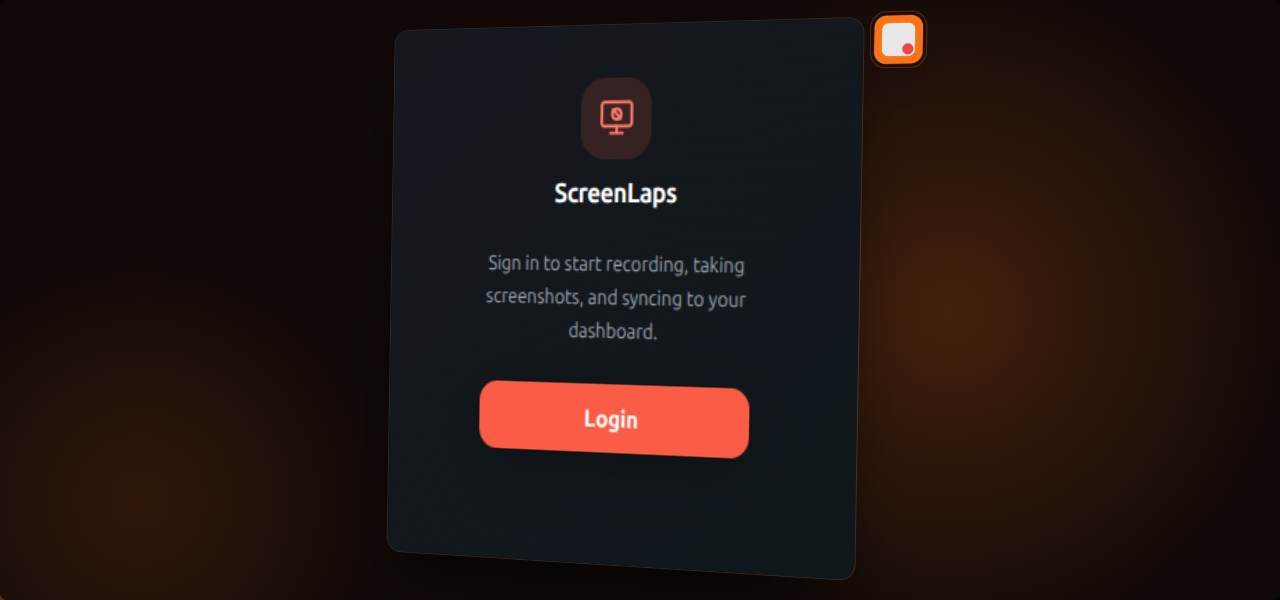
Until you log in, the extension stays in this signed-out state. Once you authenticate, the full capture-and-record interface unlocks and every capture can sync straight to your cloud library.
#2. About the Extension
The extension is your capture cockpit. From a single popup you can take a screenshot in any of three modes, record your screen with or without your webcam and microphone, choose where recordings are stored, and jump to your dashboard — all without opening a new tab.
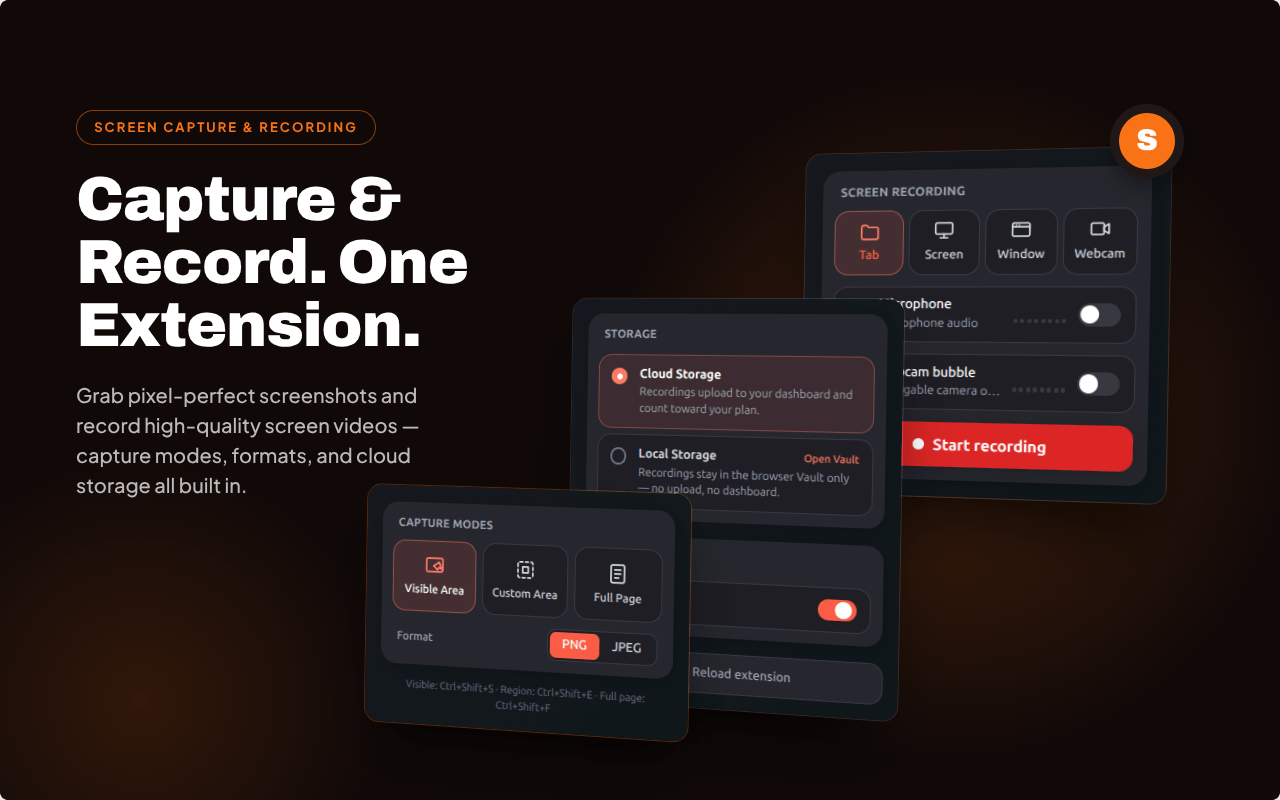
Here's what every control does:
#Screenshot capture modes
- Visible Area — captures exactly what's on screen right now, the way
your viewport looks. Shortcut:
Ctrl+Shift+S. - Custom Area — drag to select any region of the page and capture just
that rectangle. Shortcut:
Ctrl+Shift+E. - Full Page — captures the entire scrollable page top to bottom, not
just the part you can see. Shortcut:
Ctrl+Shift+F.
#Image format
Choose the output format for your screenshots before you capture:
- PNG — lossless, best for crisp UI, text, and diagrams.
- JPEG — smaller files, best for photos and image-heavy pages.
#Screen recording sources
Pick what the recorder captures:
- Tab — records only the current browser tab.
- Screen — records your whole display.
- Window — records a single application window.
- Webcam — records from your camera.
#Microphone and webcam bubble
Two toggles let you layer yourself into a recording:
- Microphone — turn on to capture your voice / narration alongside the screen audio.
- Webcam bubble — turn on to overlay a small, draggable camera bubble on top of the recording, so viewers see you while you present.
#Storage: Cloud vs. Local Vault
Before you hit record, decide where the file lives:
- Cloud Storage — recordings upload to your dashboard and count toward your plan. Best when you want your media organized, searchable, and shareable.
- Local Storage (Local Vault) — recordings stay in the browser's Vault only. No upload, no dashboard sync — private by default. You can open the Vault at any time to review or manage those files.
#Start recording & reload
- Start recording — begins capture using the sources, mic, webcam, and storage options you selected.
- Reload extension — quickly reloads the extension if you ever need to reset its state.
Ctrl+Shift+S for the visible
area, Ctrl+Shift+E for a region, and
Ctrl+Shift+F for a full-page screenshot. They're the fastest way
to capture without opening the popup at all.
#3. About the Website
The dashboard is where captures become a library. It organizes every screenshot and recording, gives you a full annotation editor for images and a video editor for recordings, and lets you share any item with a link. There's a Local Vault too, mirroring the extension's local recordings inside the dashboard.
#Cloud Library — every capture, organized
The Library is home base. Store, search, and manage all your screenshots and recordings, and act on many items at once.
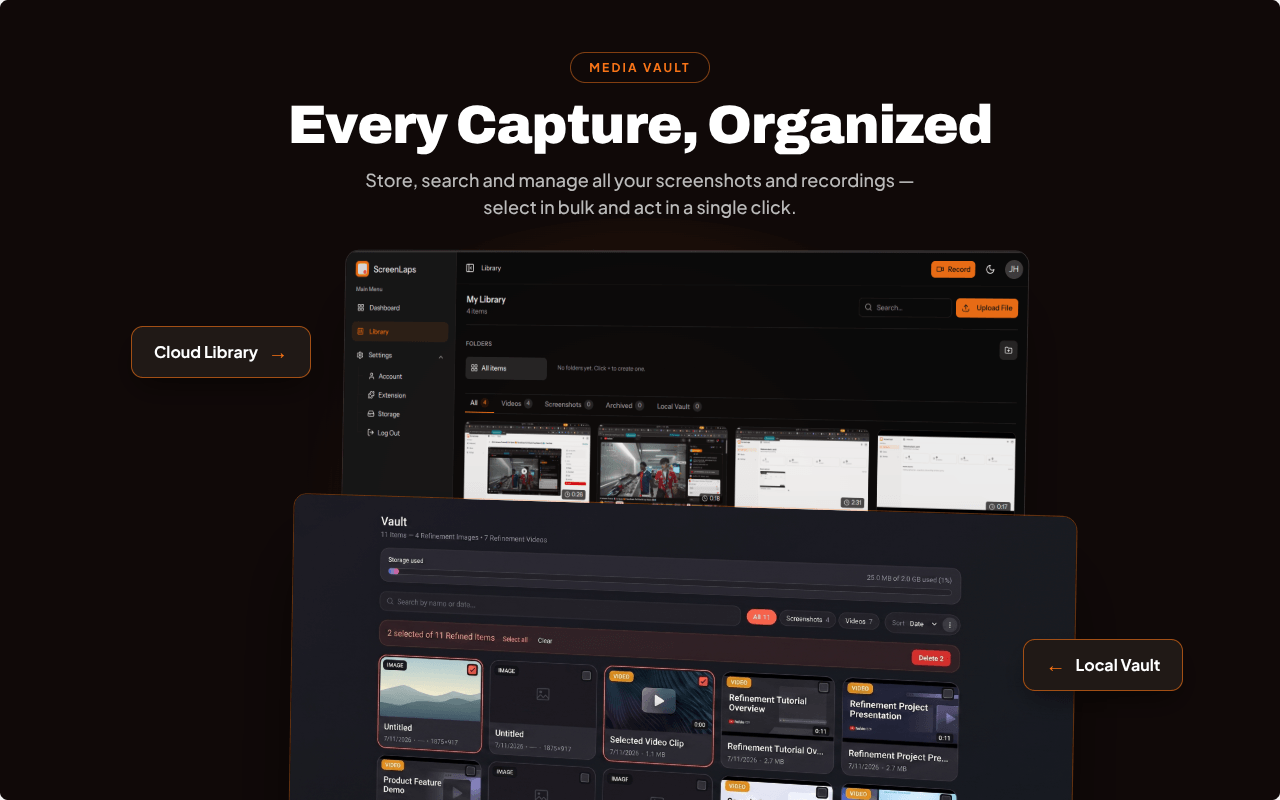
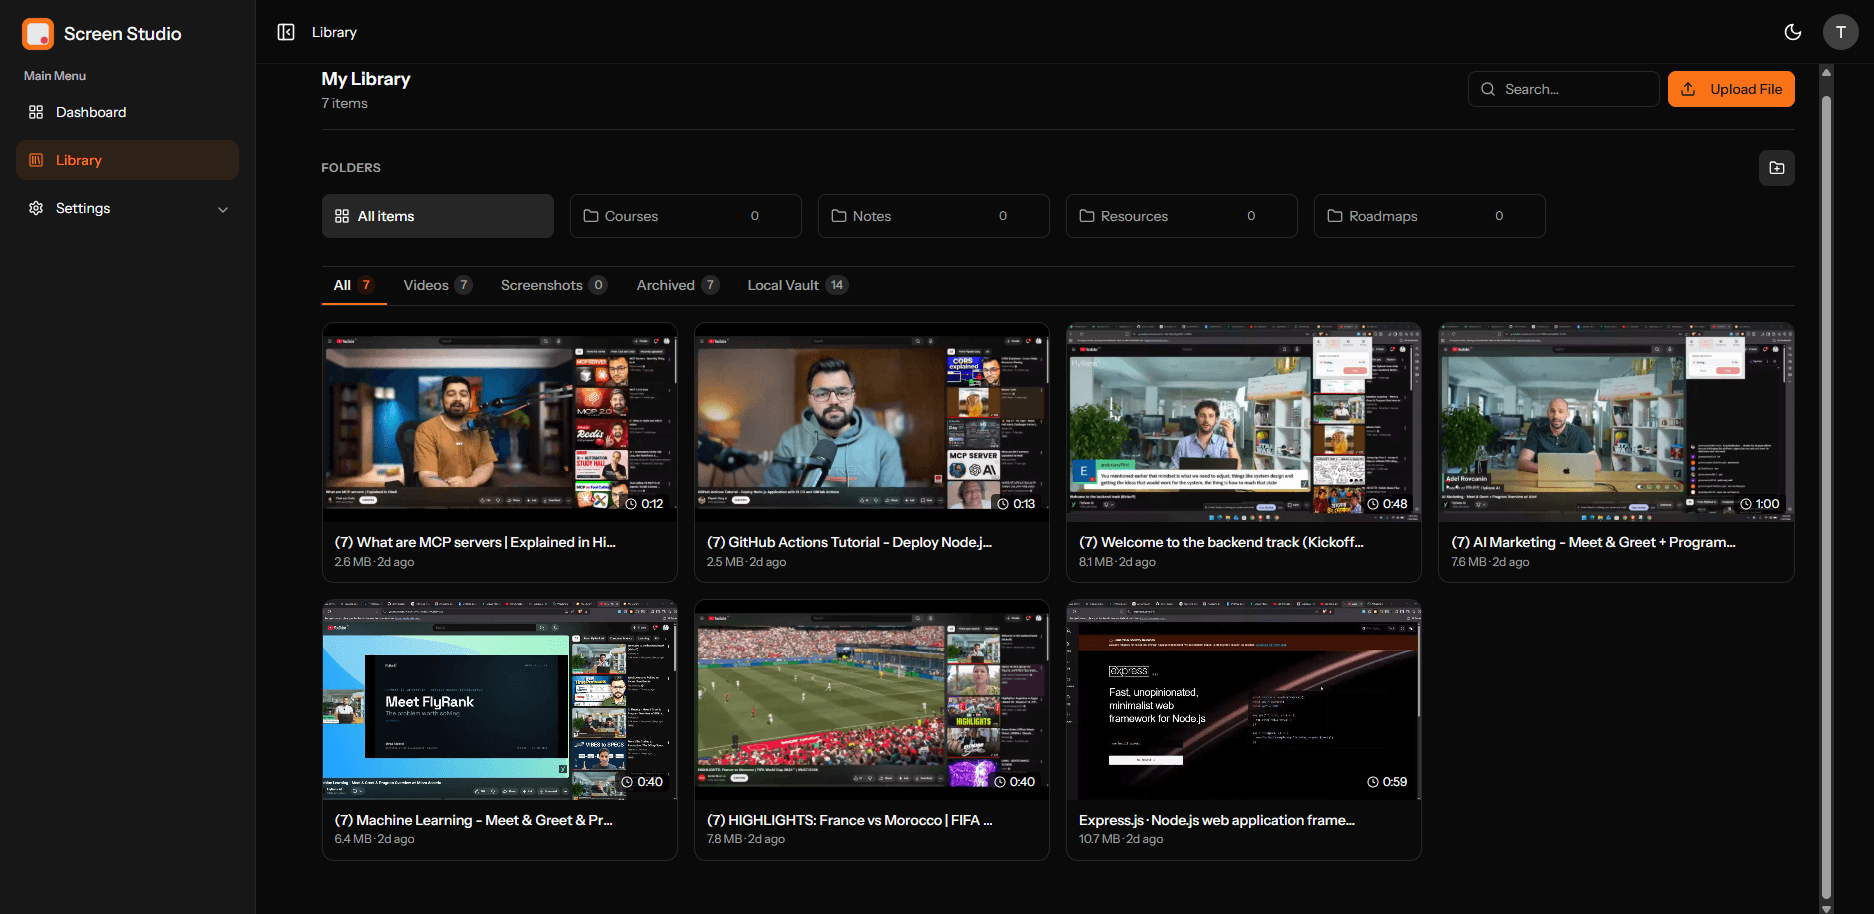
Open the Library and you get a clean grid of every capture, a live Search box, an Upload File button for adding media by hand, and Folders (like Courses, Notes, Resources, and Roadmaps) to group related items. Tabs across the top — All, Videos, Screenshots, Archived, and Local Vault — filter the grid to exactly what you want to see, and each tab shows a live count.
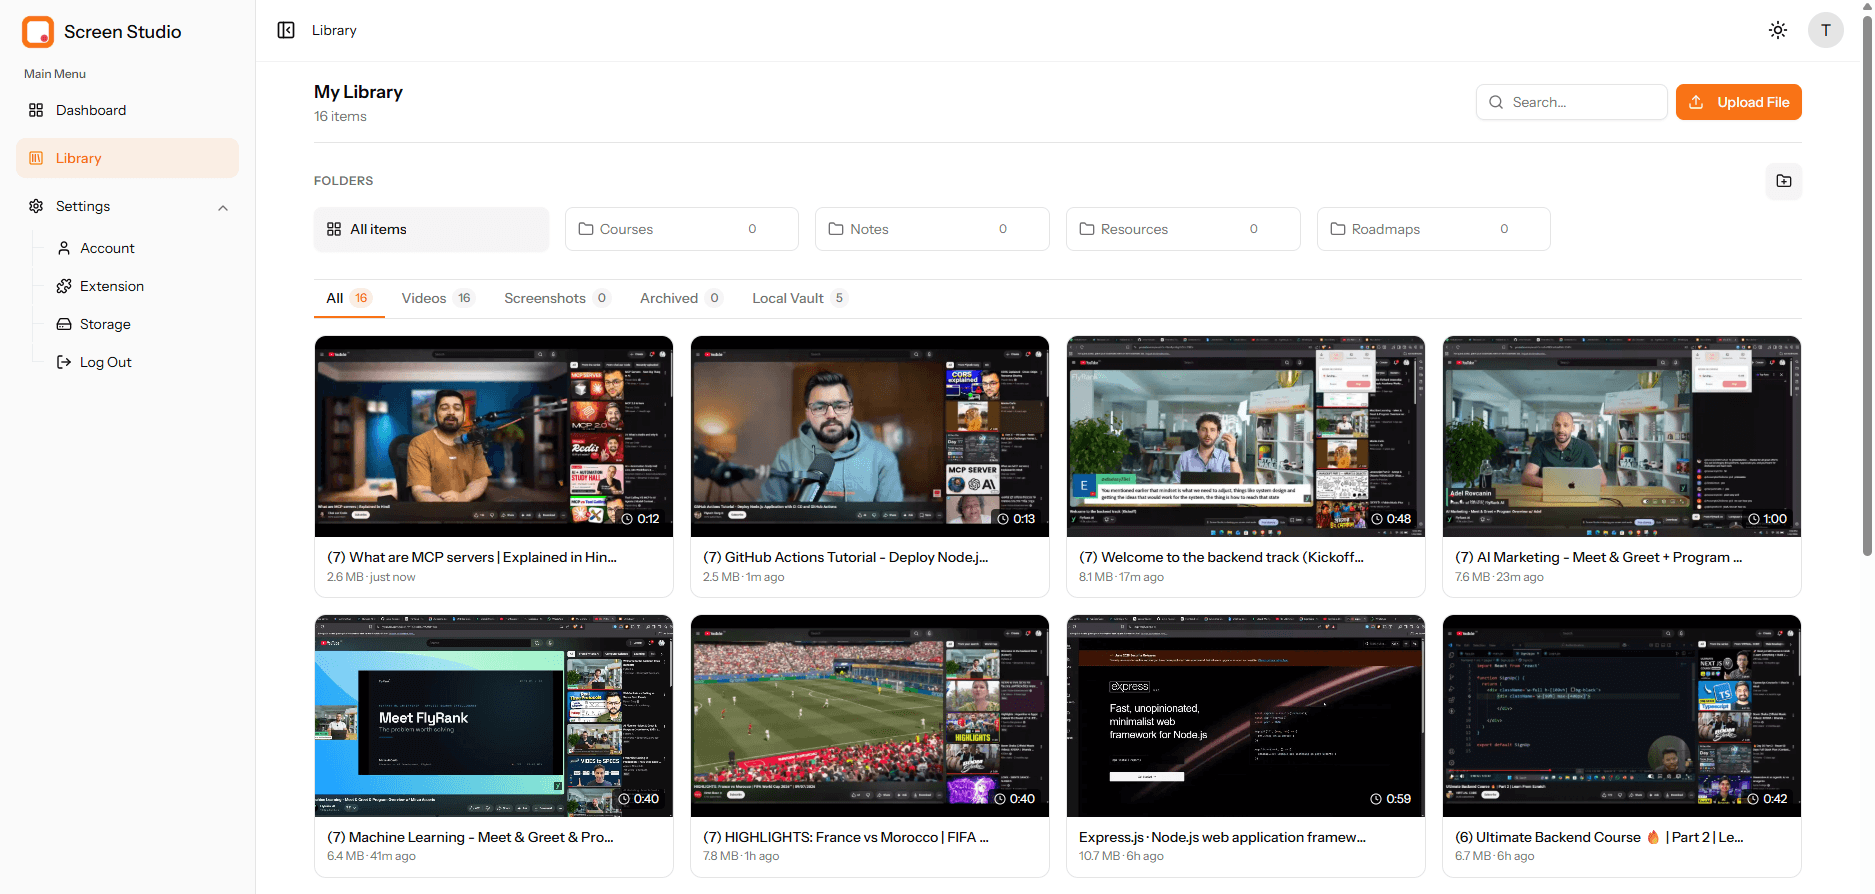
The whole dashboard follows your theme. Prefer to work at night? Switch to dark mode and the entire library adapts.
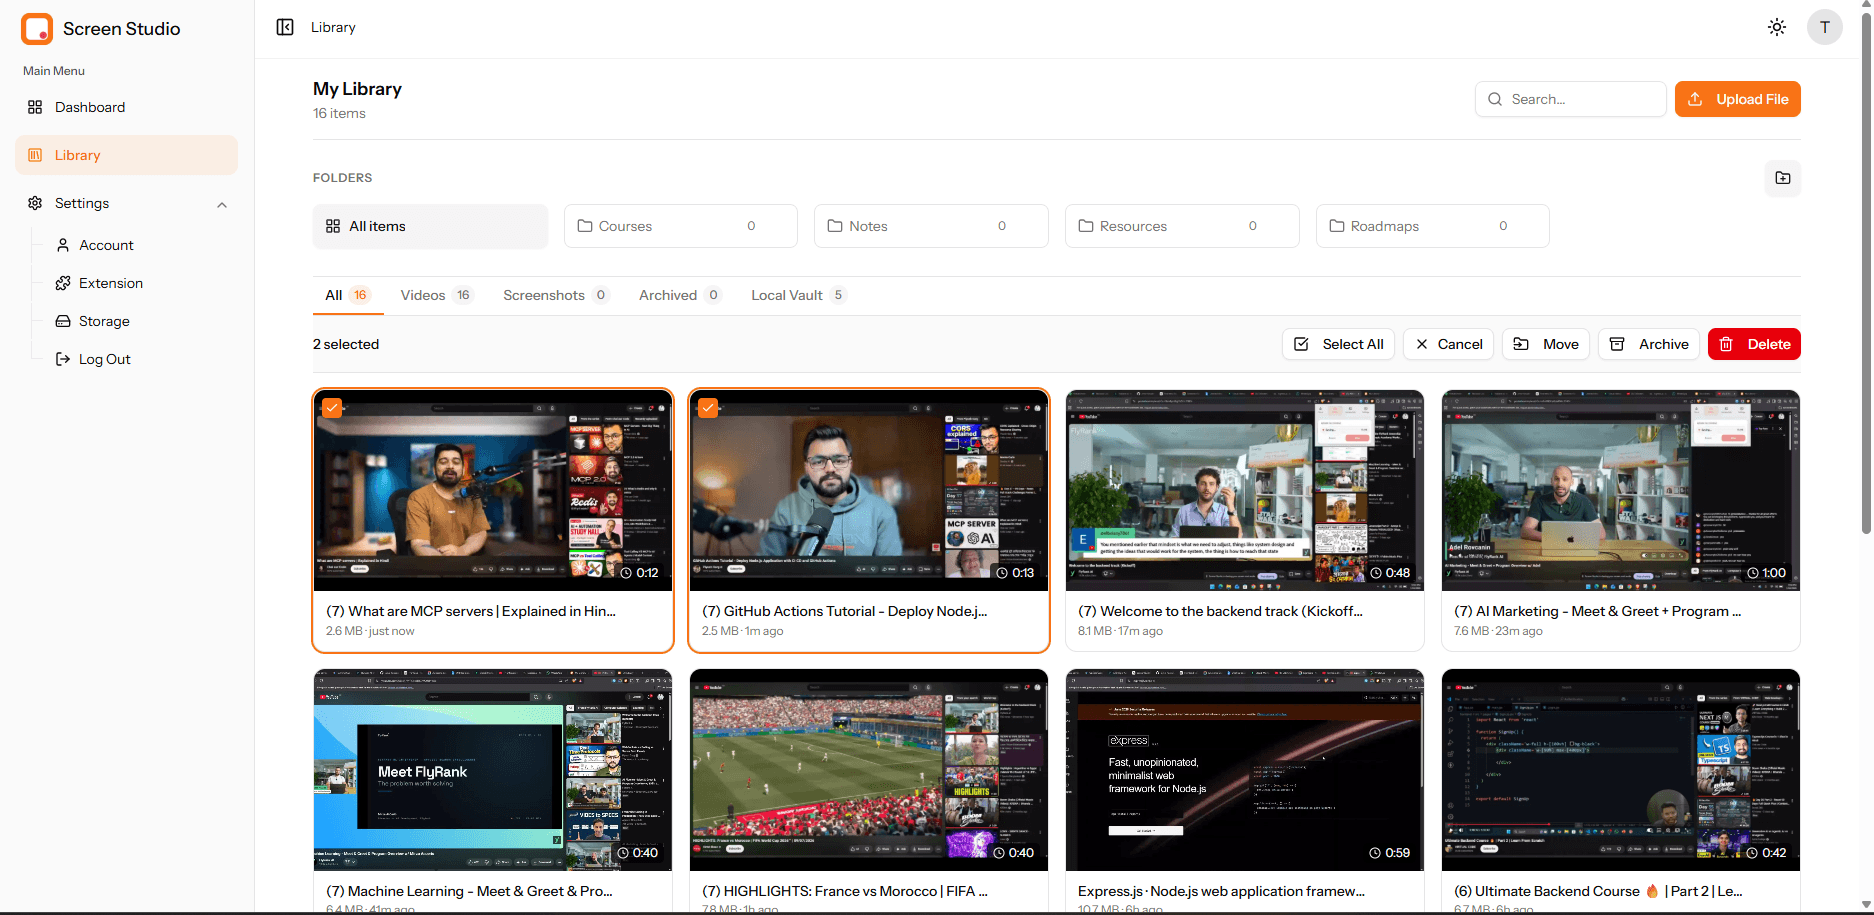
Bulk actions
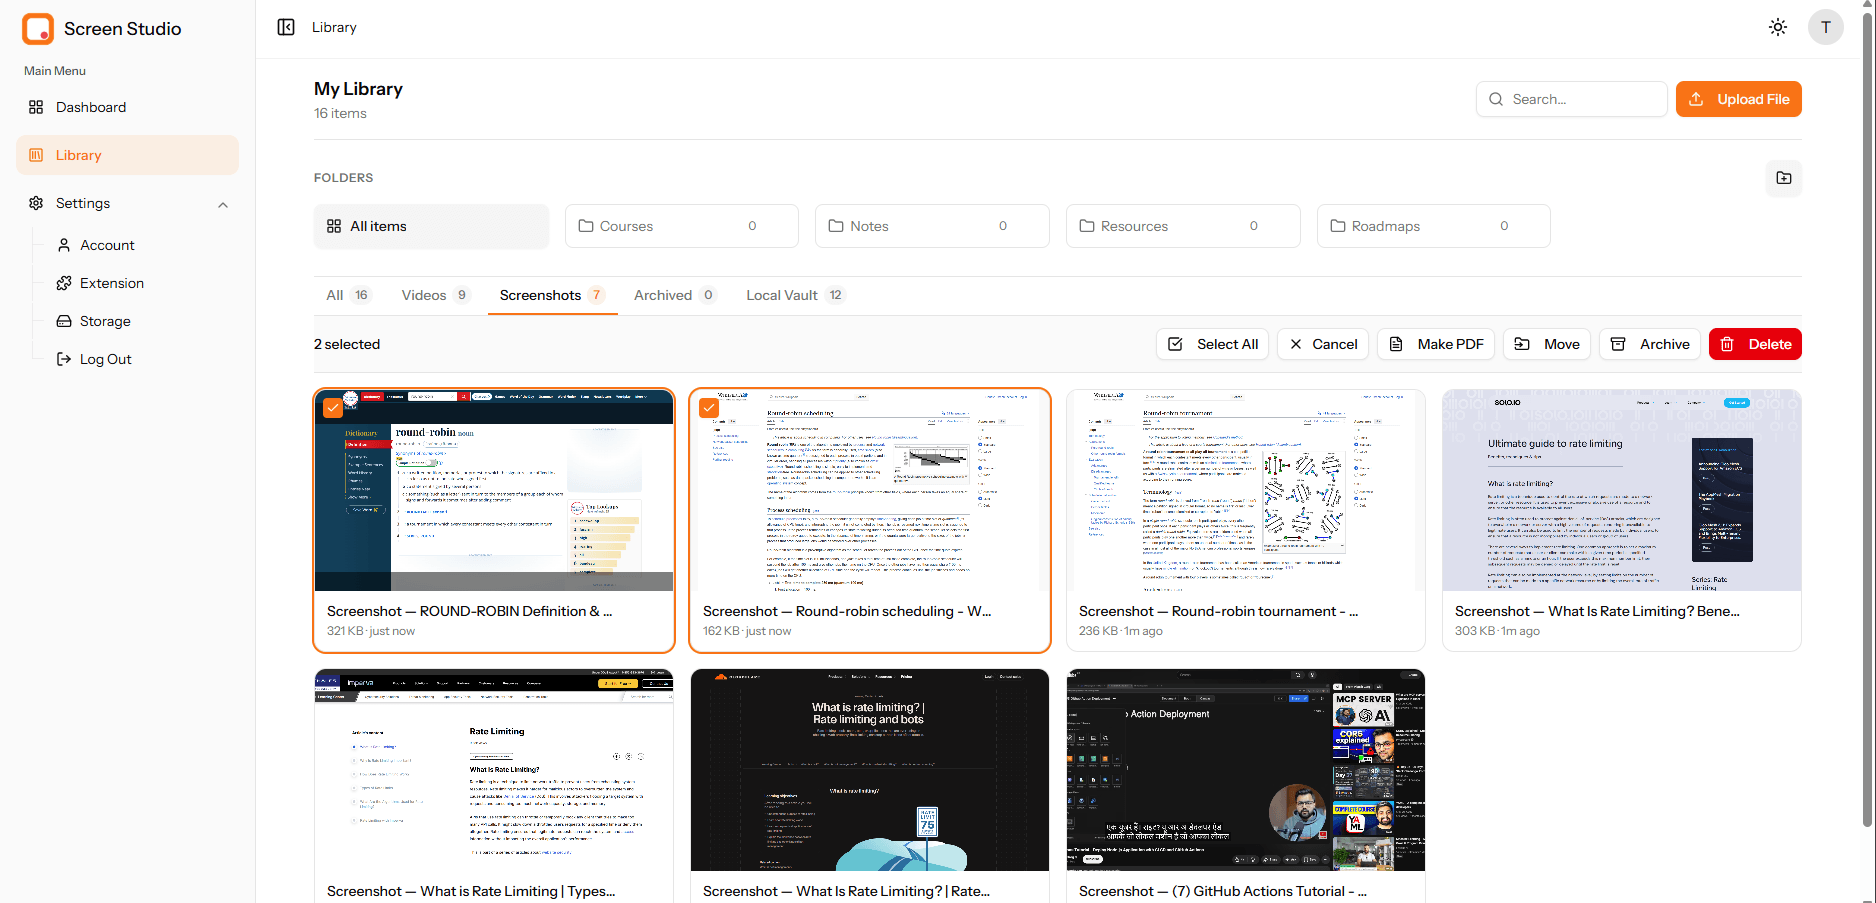
Select one or more items and an action bar appears. On the All tab you can Select All, Move items into a folder, Archive them, or Delete them — no need to open each item one at a time.
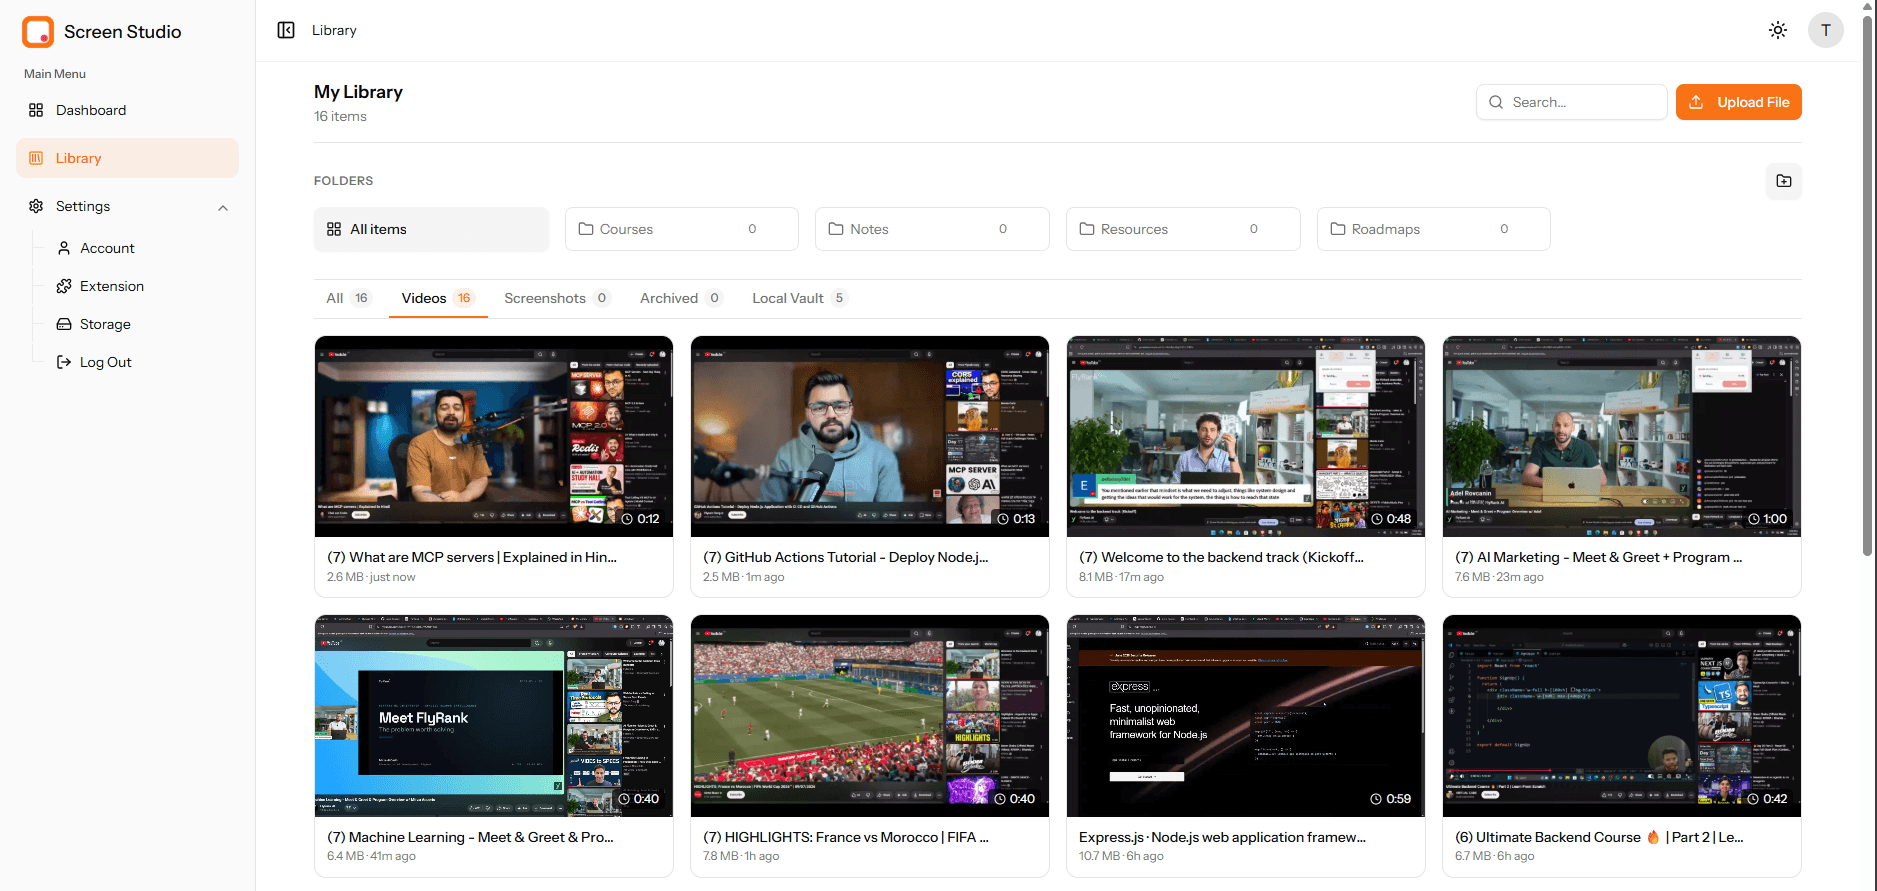
Videos
The Videos tab narrows the grid to just your recordings, each with its duration and file size at a glance.
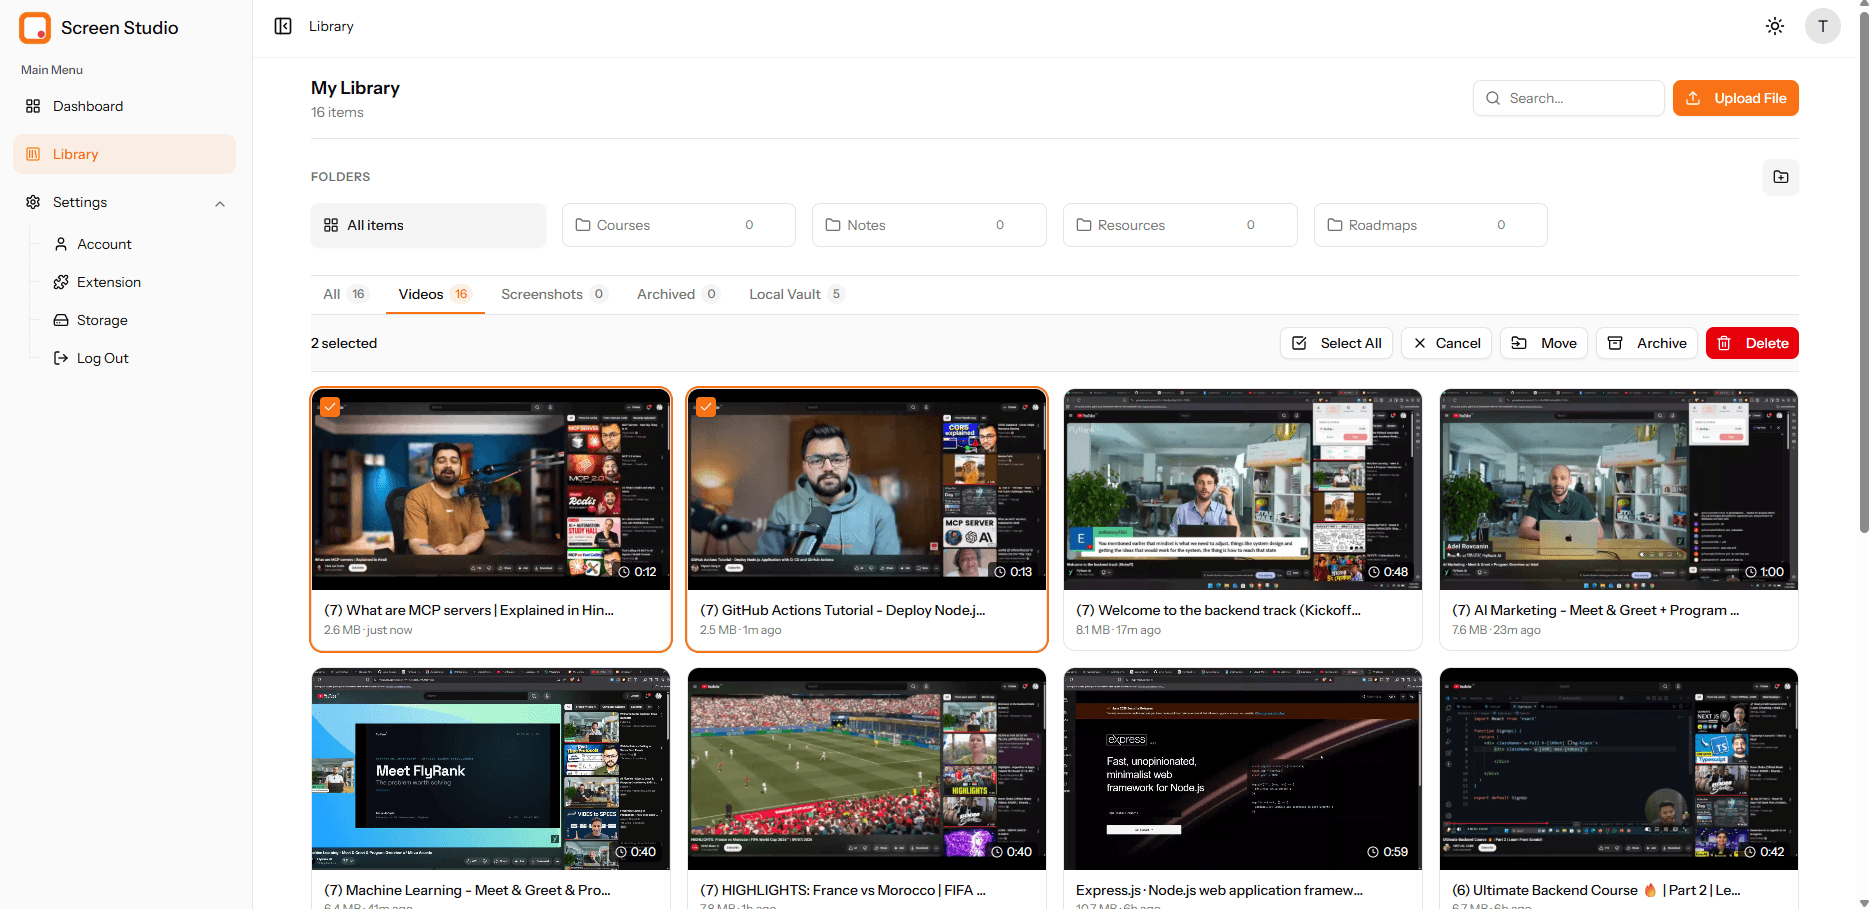
Bulk actions work here too — select several recordings and move, archive, or delete them together.
Screenshots
The Screenshots tab collects every image you've captured or uploaded.
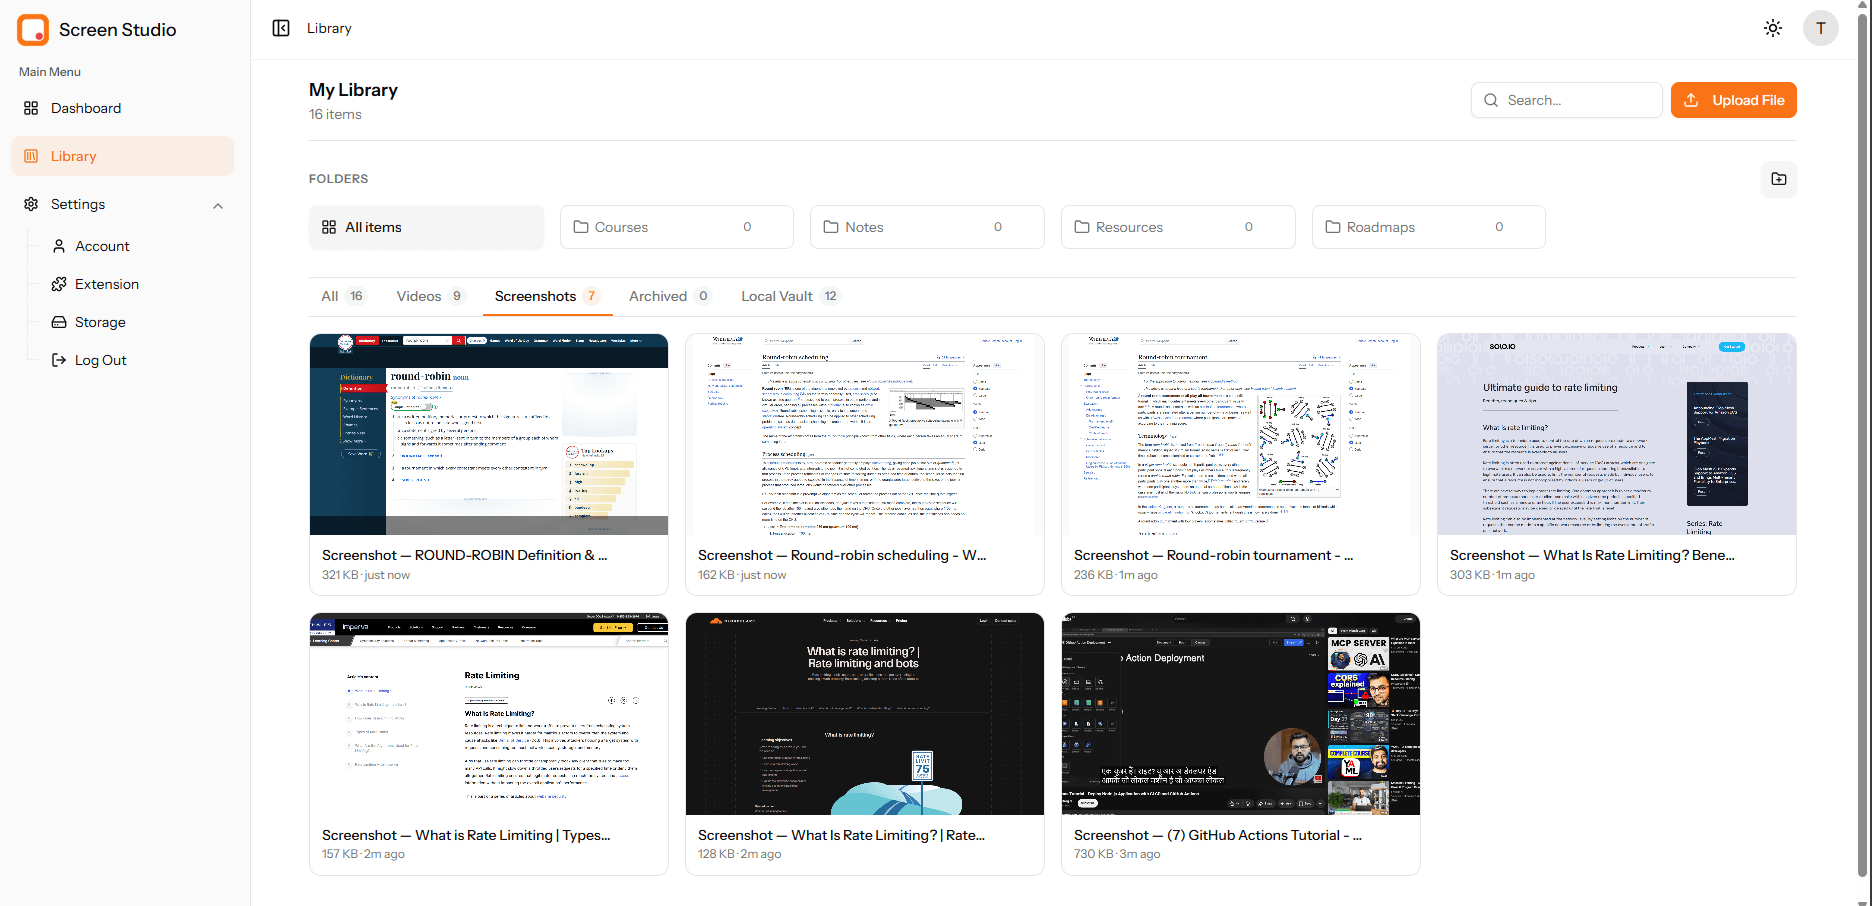
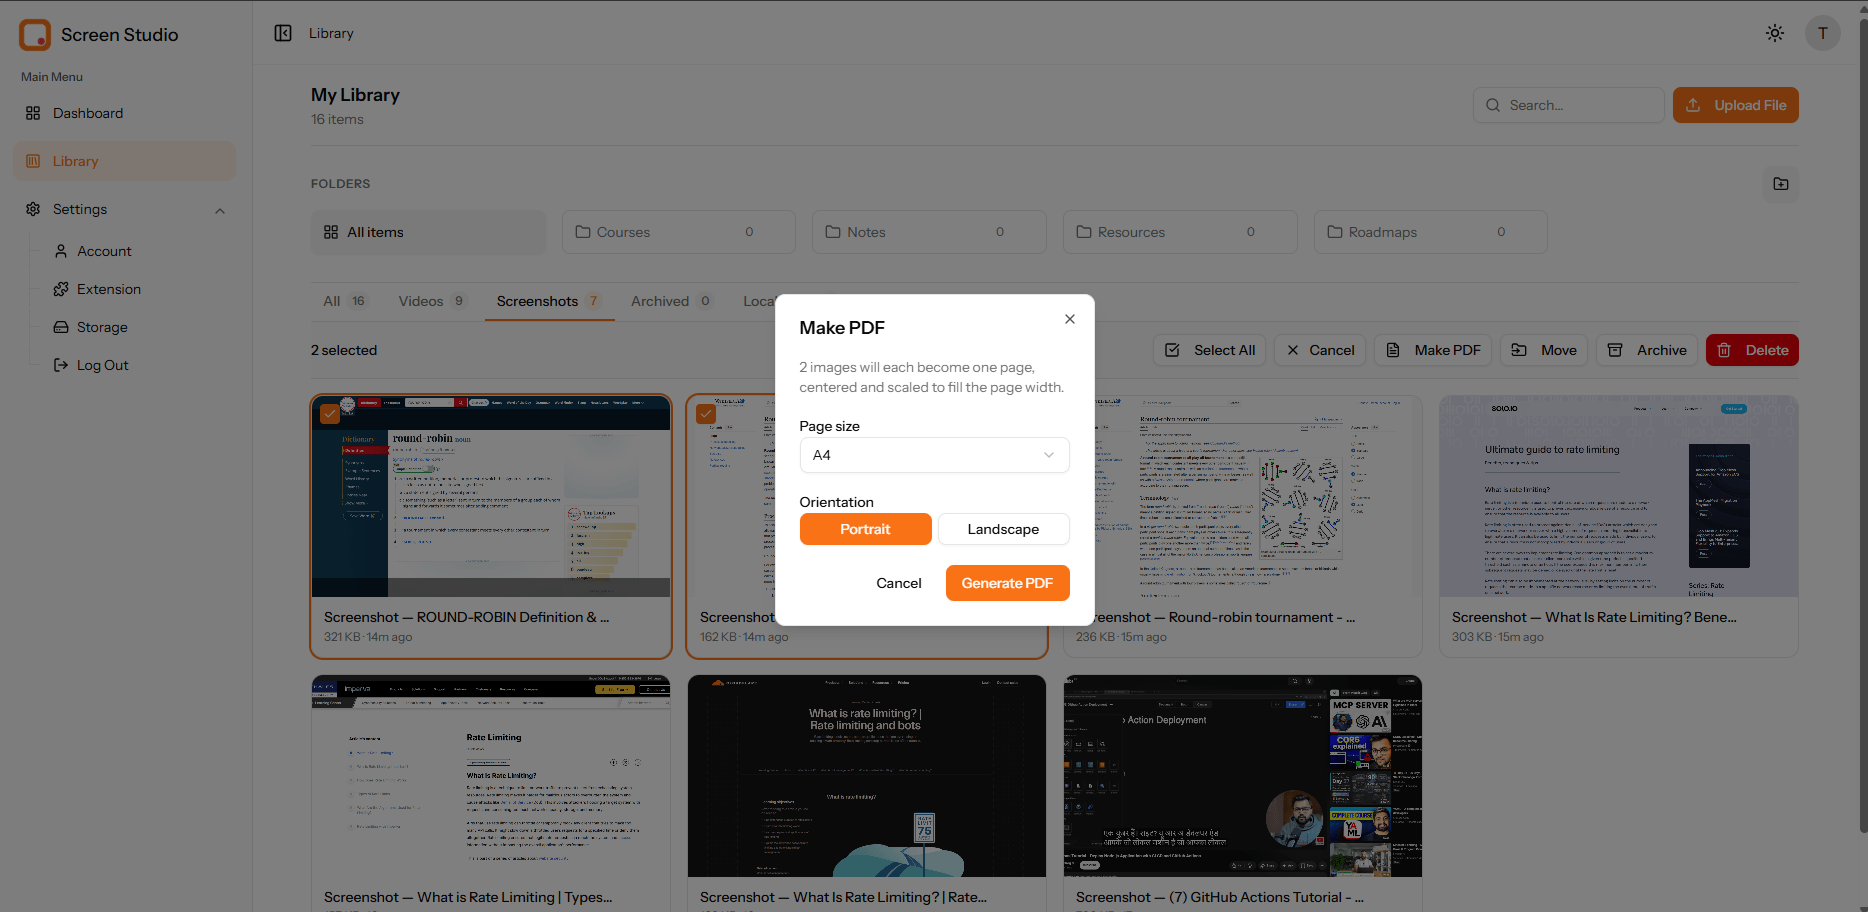
Screenshots get one extra bulk action the videos don't: Make PDF. Select two or more screenshots and you can combine them into a single PDF document.
Choosing Make PDF opens a small dialog: each selected image becomes one page, centered and scaled to fill the page width. Pick a Page size (such as A4) and an Orientation — Portrait or Landscape — then generate the PDF.
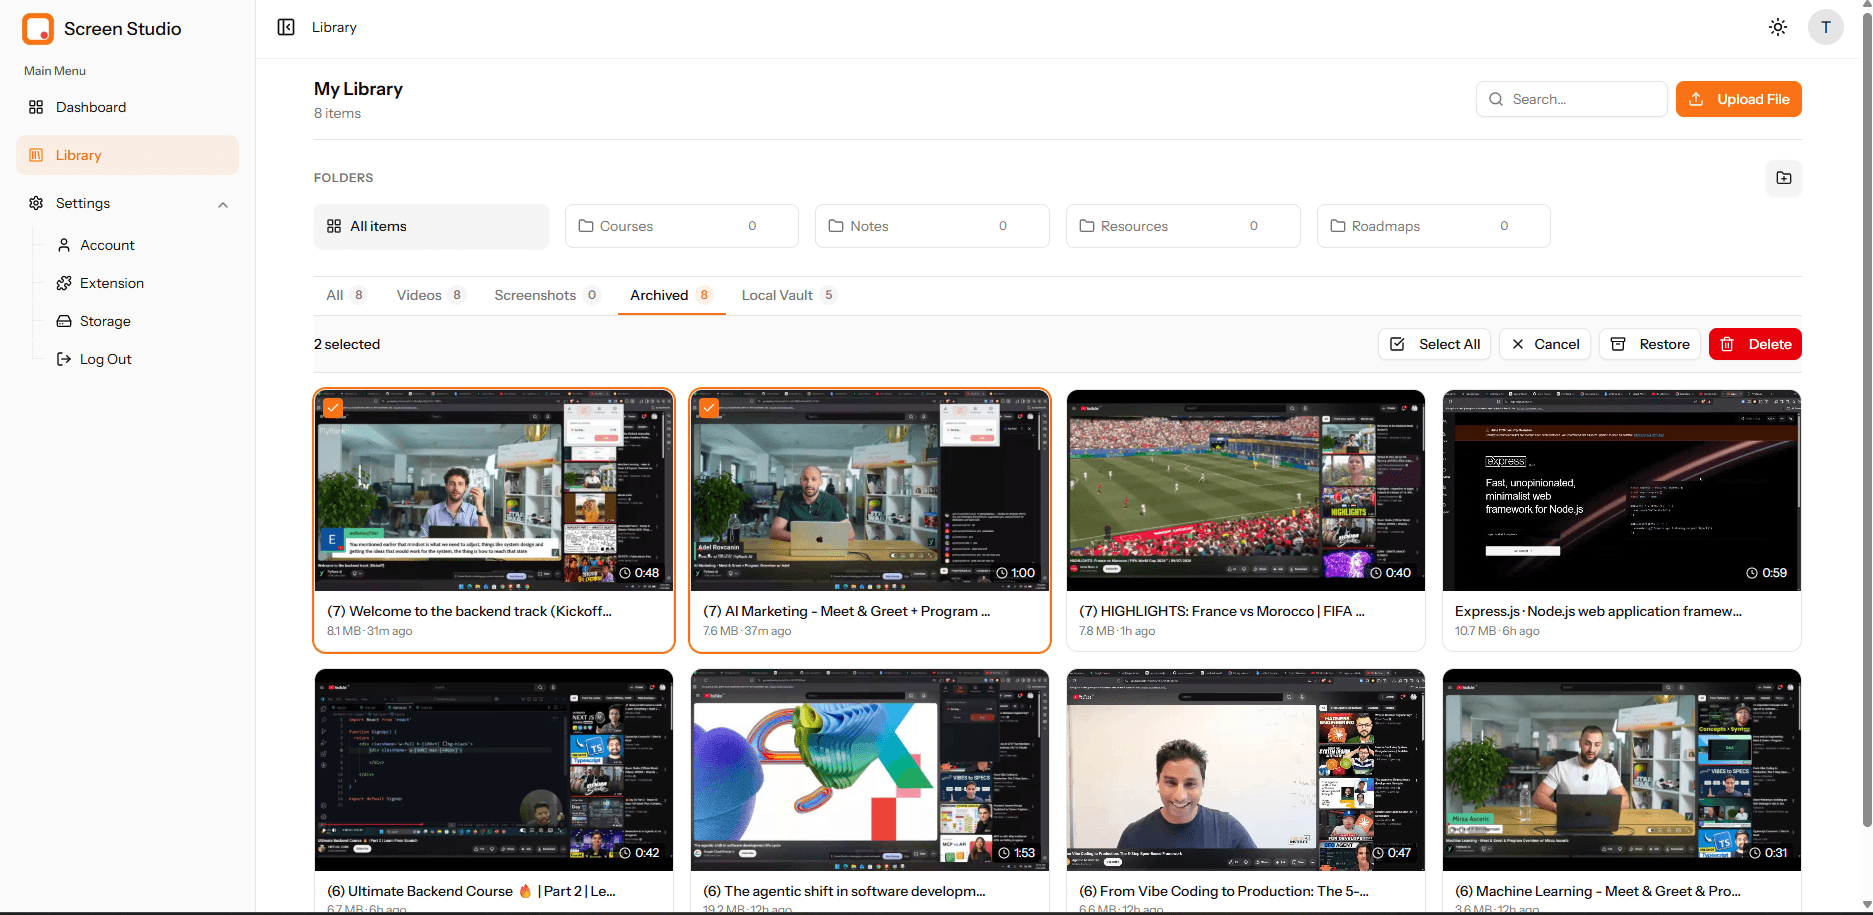
Archived
Archiving keeps your main library tidy without deleting anything. The Archived tab shows everything you've set aside.
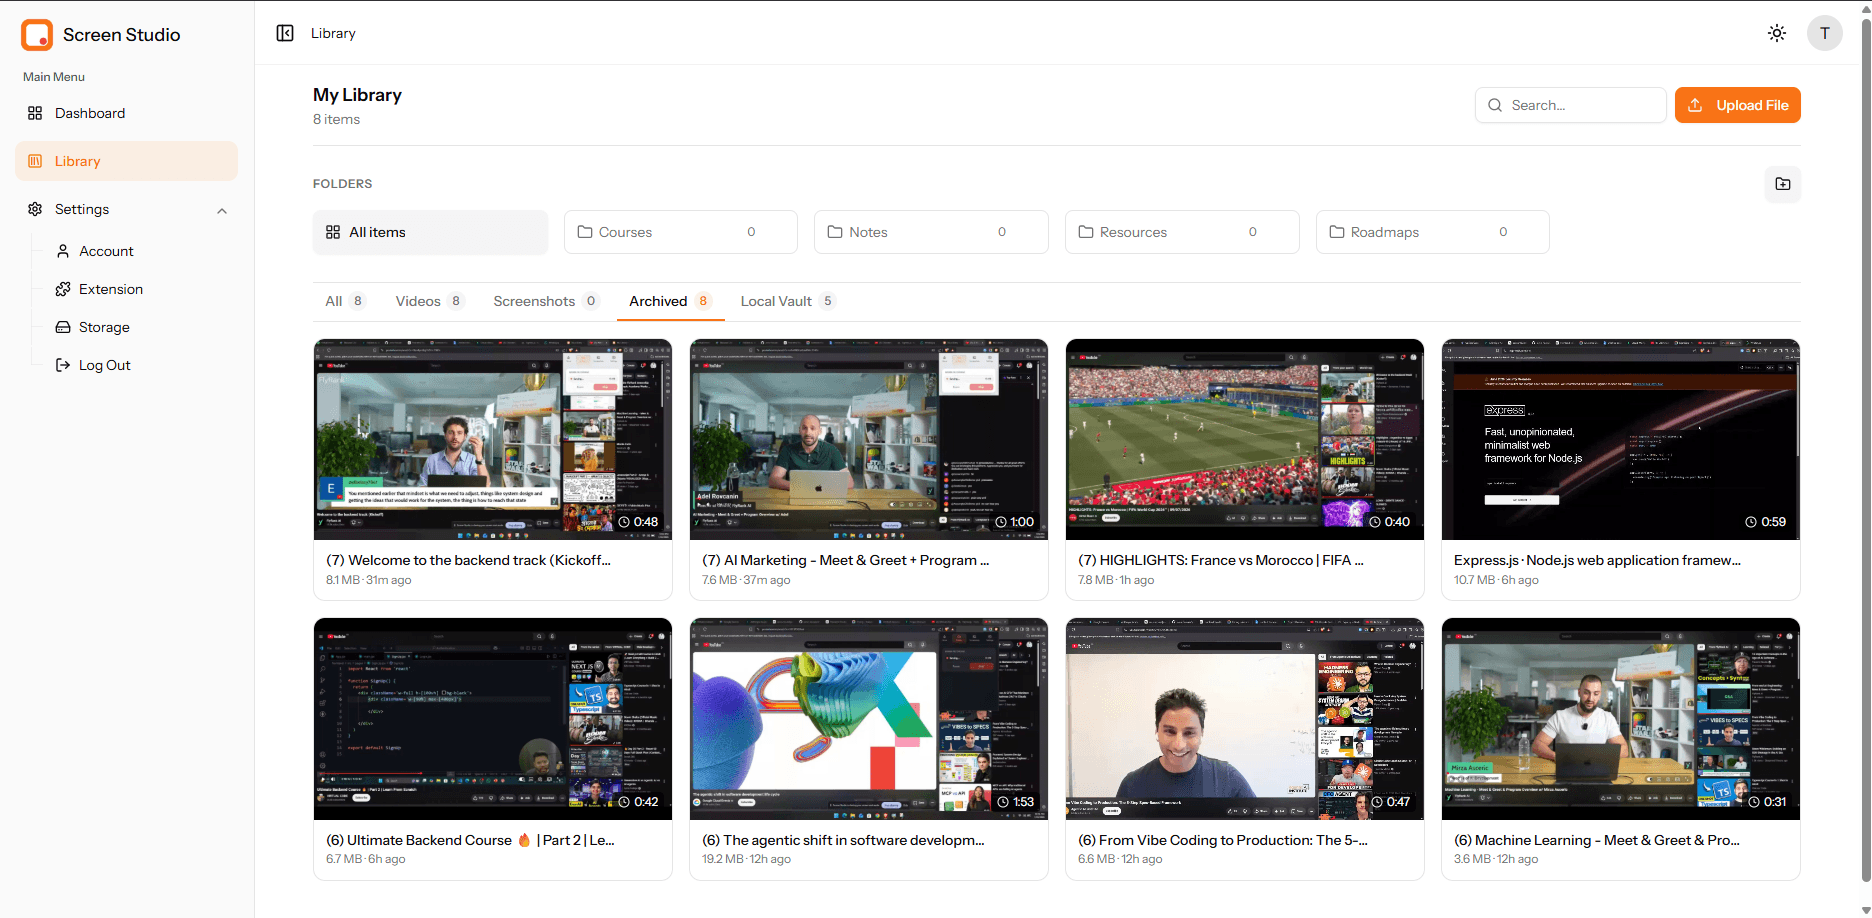
Select archived items and the action bar swaps in a Restore option, so you can pull anything back into the active library — or delete it for good.
#Local Vault — private, browser-only media
The Local Vault is the dashboard's view of recordings and screenshots that live only in your browser — the ones you captured with Local Storage selected in the extension. They never upload and don't count against your cloud plan.
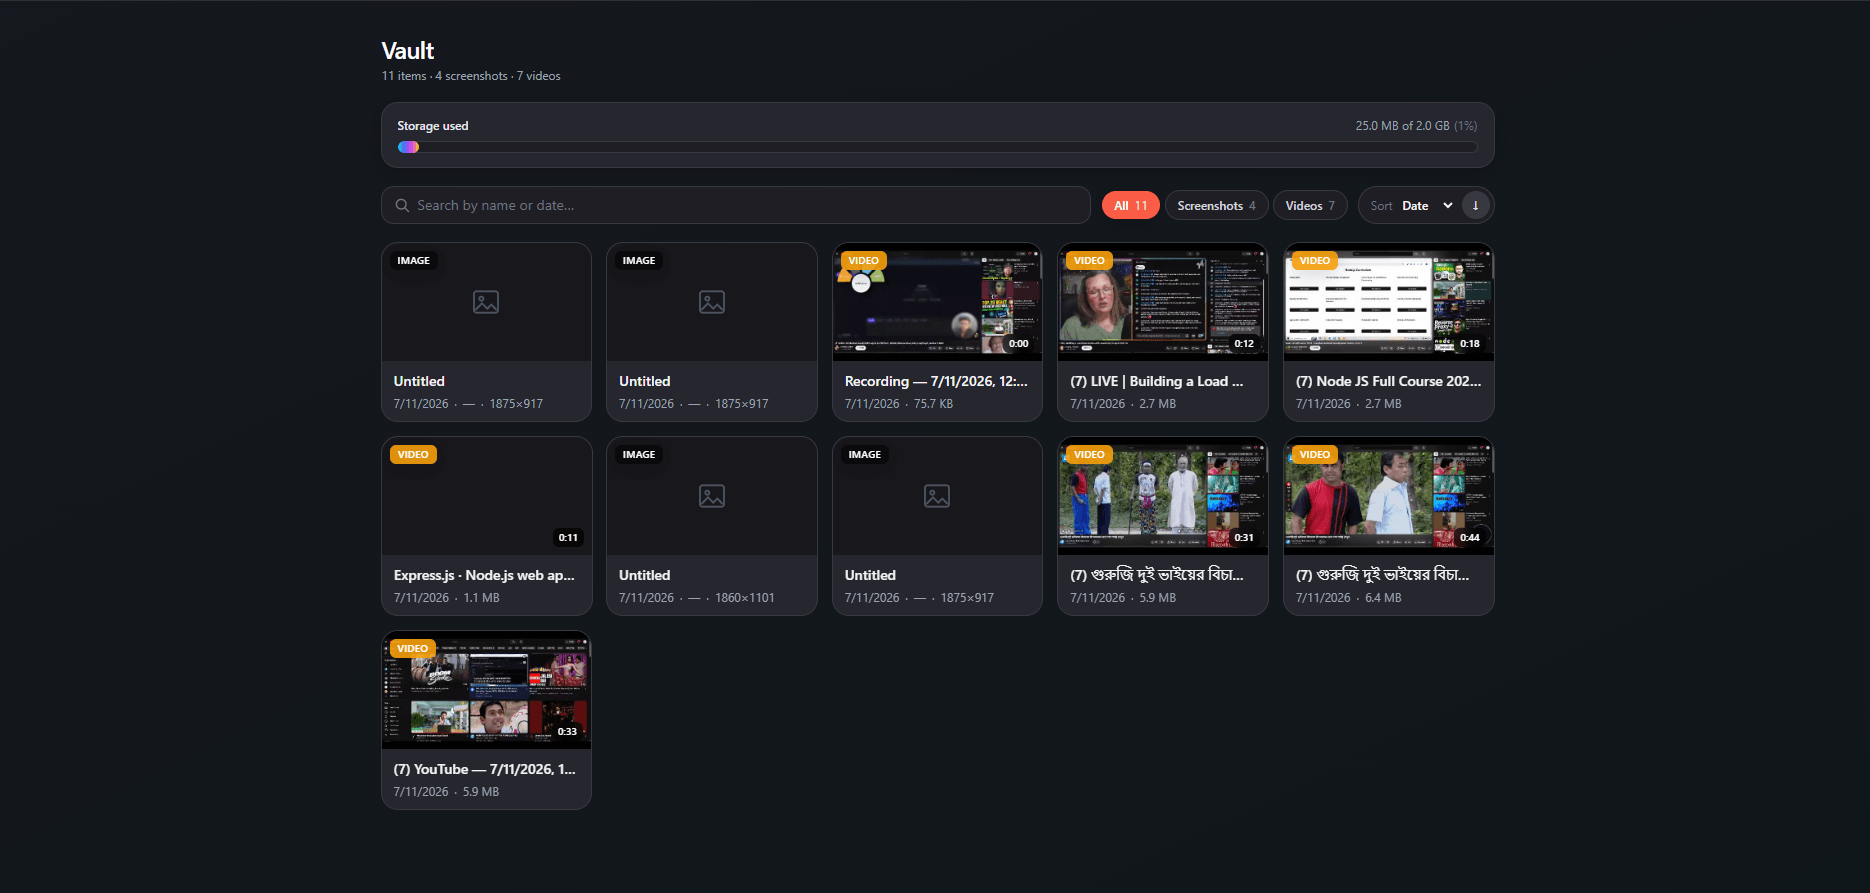
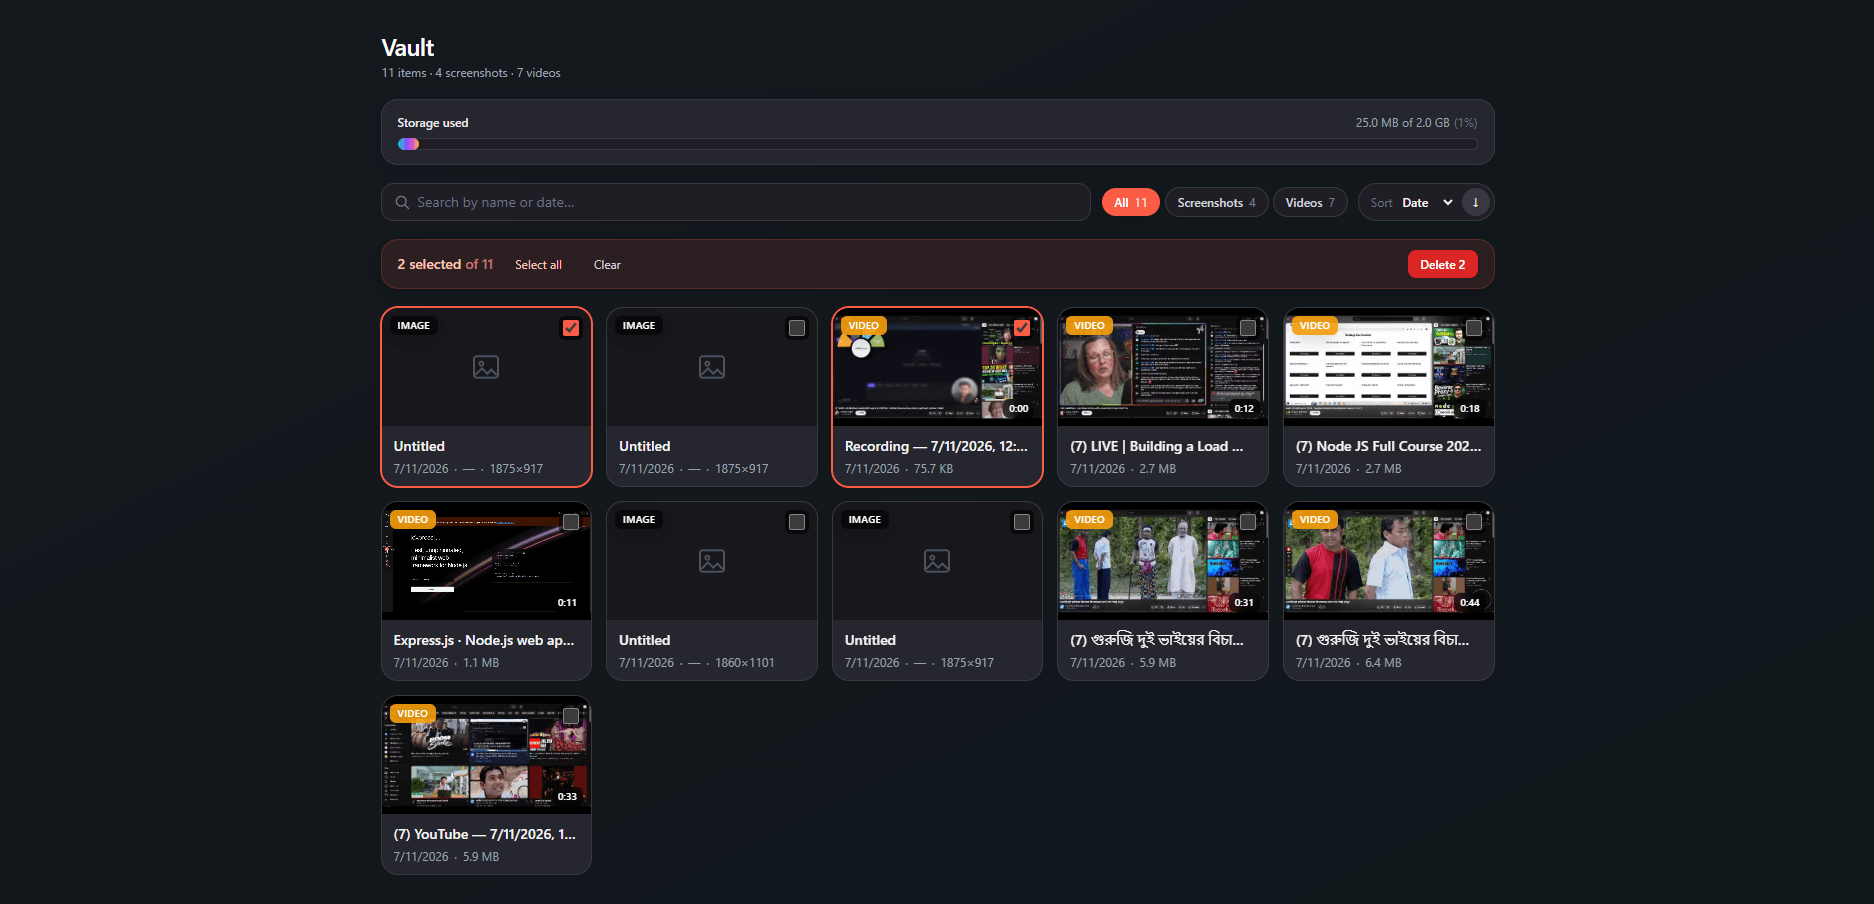
The Vault shows a Storage used meter, a search box, and All / Screenshots / Videos filters with sort controls, so you can find local files fast.
You can multi-select inside the Vault as well — pick the items you no longer need and delete them in one action.
#Screenshot Editor — annotate anything
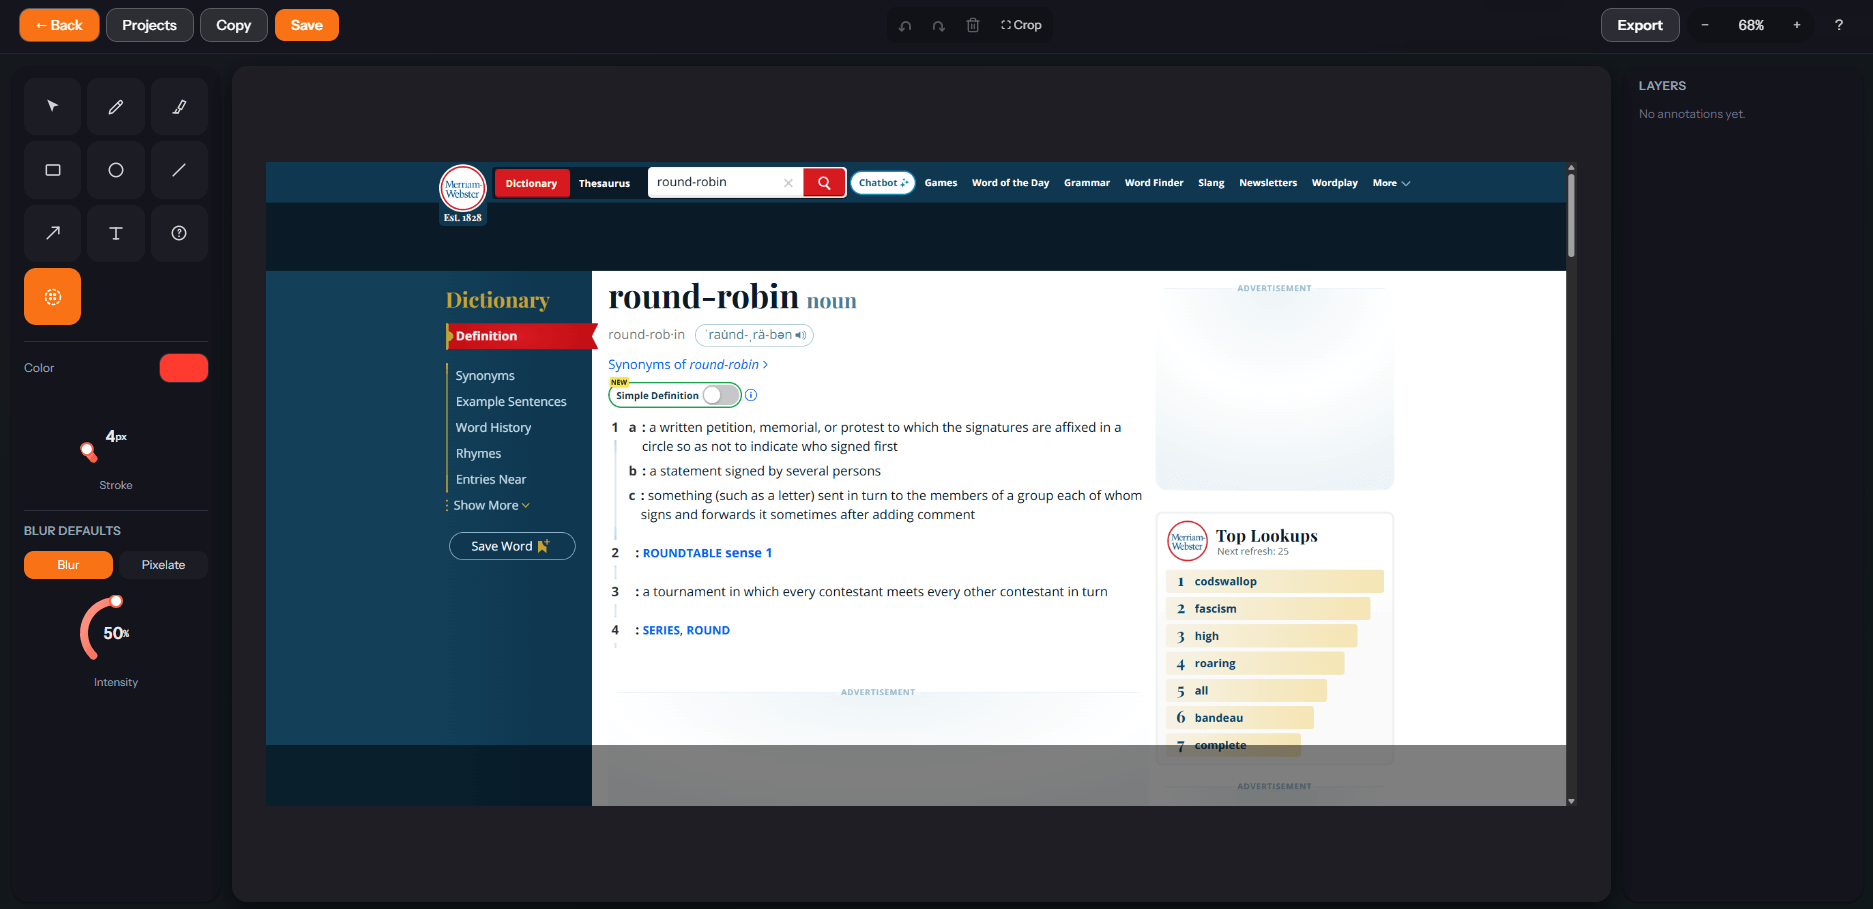
Every screenshot opens in a full annotation editor. Add shapes, text, blur, and numbered steps to polish an image before you share it.
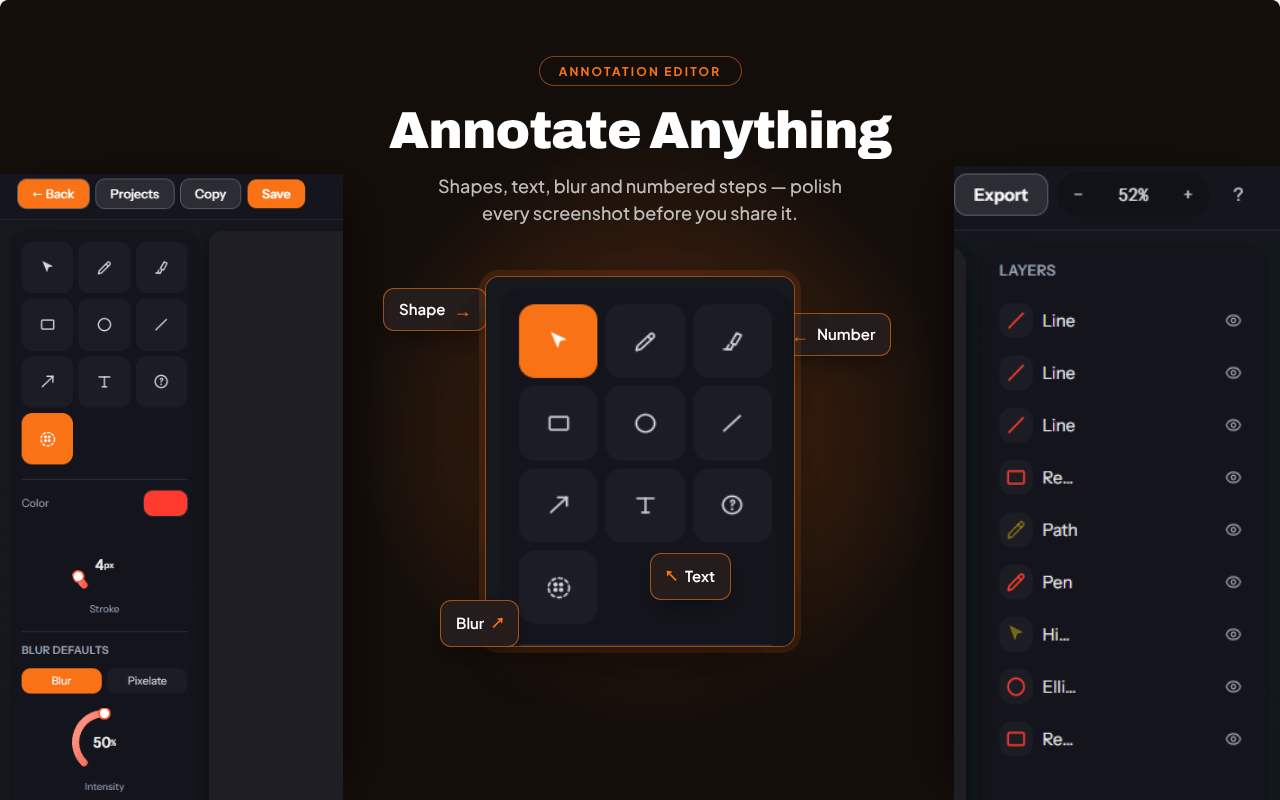
The toolbar gives you a complete annotation kit:
- Select — pick and move existing annotations.
- Pen and Brush — freehand drawing and highlighting.
- Rectangle, Ellipse, and Line — draw clean shapes.
- Arrow — point at exactly what matters.
- Text — add labels and captions.
- Number (step) — drop numbered markers to walk viewers through a sequence.
- Blur / Pixelate — hide sensitive information; switch between a soft Blur and a Pixelate effect and tune its Intensity.
You also control the annotation Color and Stroke width, and a Layers panel on the right lists every element you've added so you can select, hide, or reorder them. When you're done, Copy, Save, or Export the finished image, and Crop or zoom as needed.
#Video Editor — edit, enhance, share
Recordings open in a browser-based video editor so you can polish them without any desktop software.
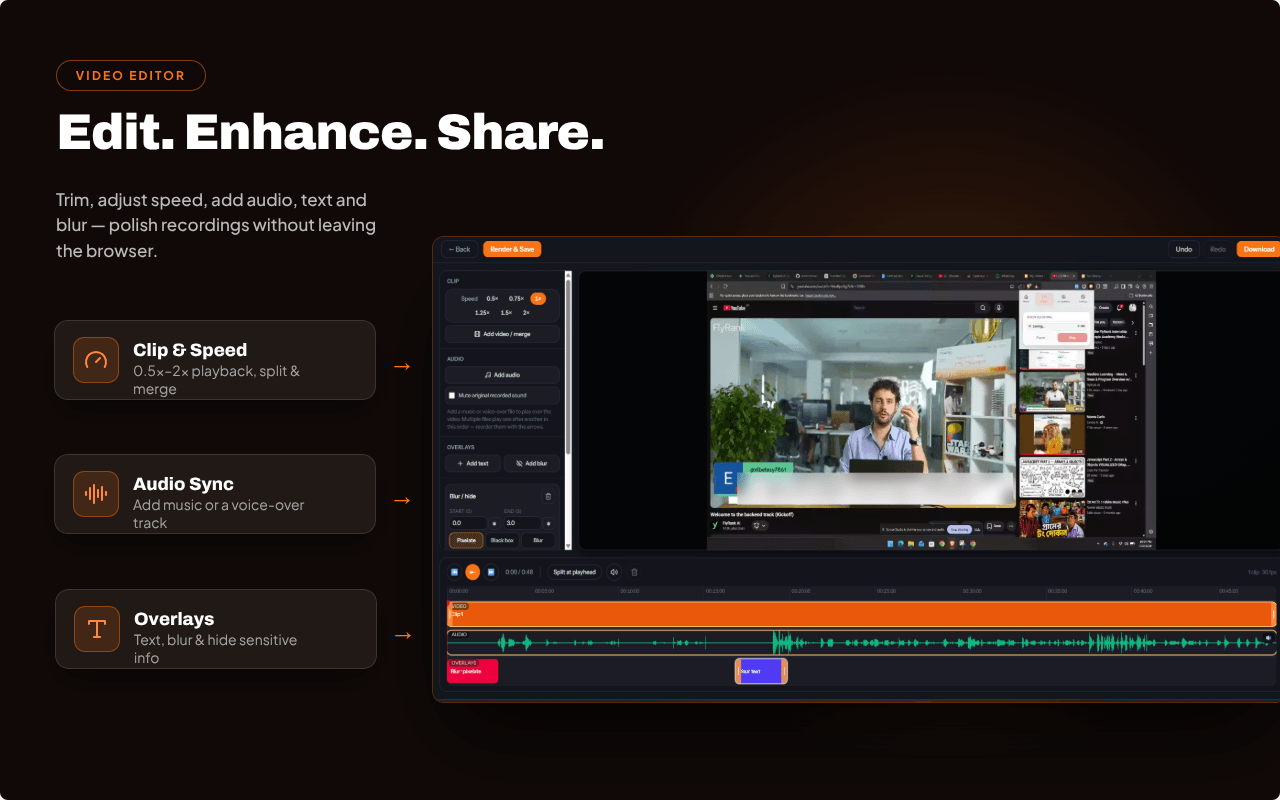
The editor is built around three groups of tools:
- Clip & Speed — trim the recording, change playback speed from 0.5× to 2×, and split or merge clips. You can also add another video / merge into the timeline.
- Audio Sync — add music or a voice-over track, or mute the original recorded sound. Multiple audio files play one after another in order, and you can reorder them.
- Overlays — add text anywhere on the video, and add blur to hide sensitive info, choosing between Pixelate, Black box, or Blur for any time range you set with start/end points.
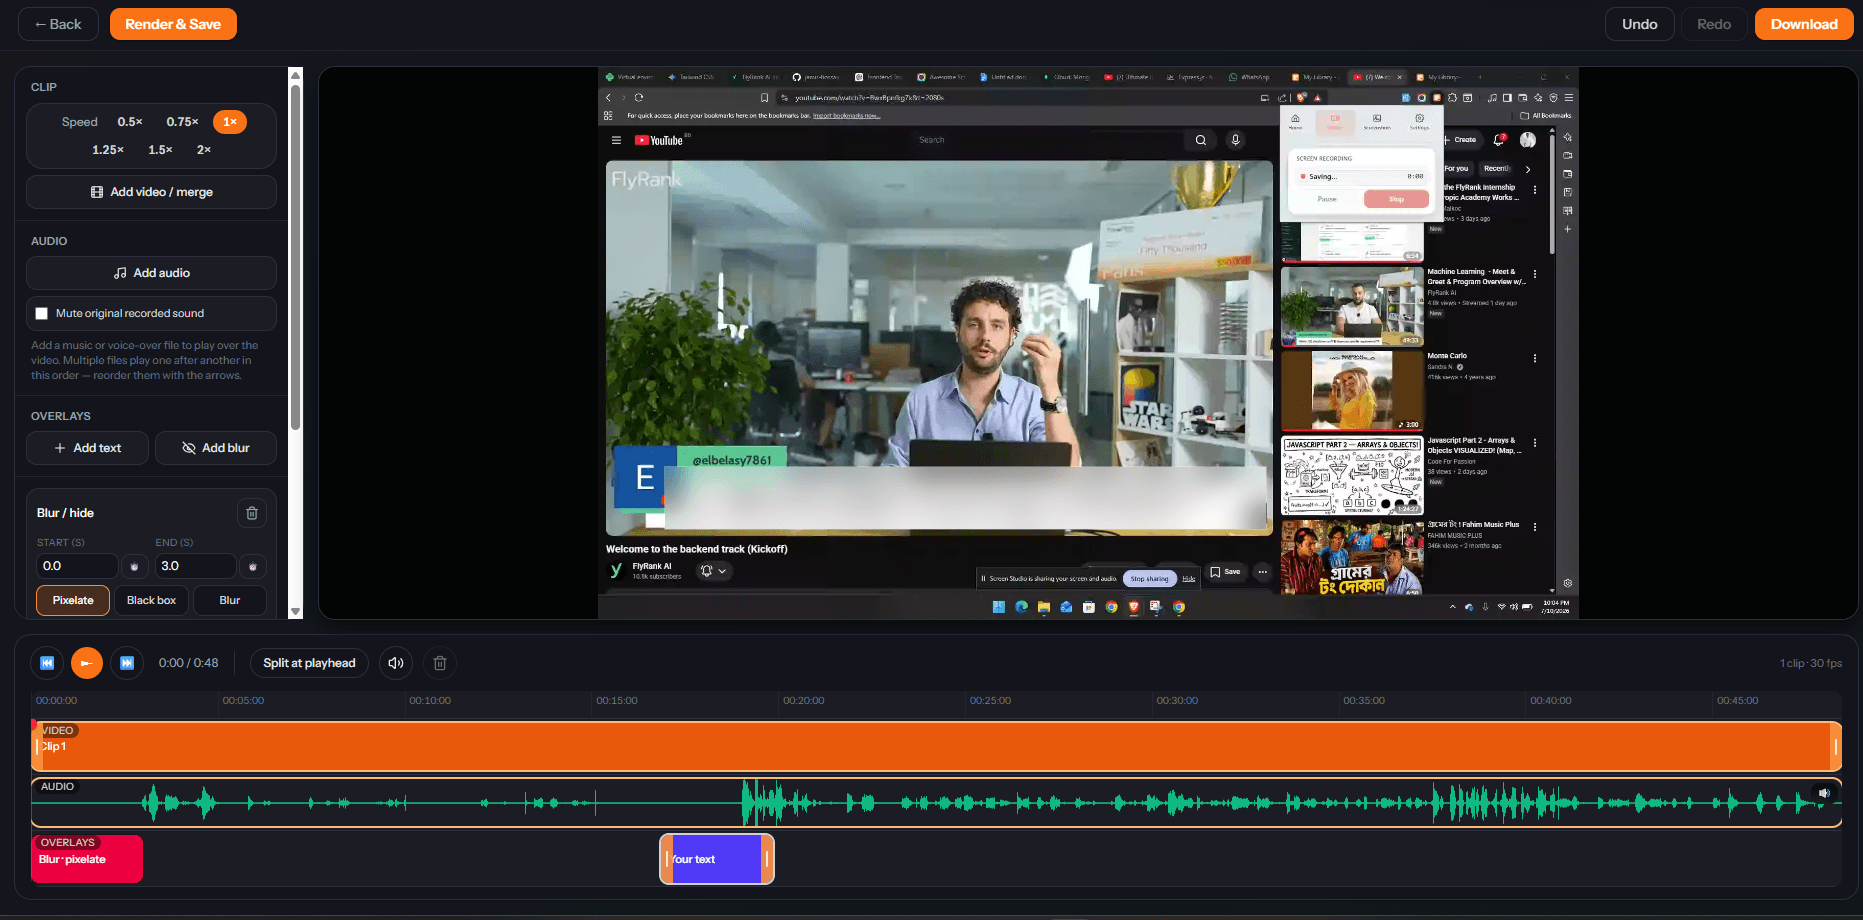
A timeline at the bottom shows your video, audio waveform, and overlay tracks together, with a playhead, Split at playhead, undo/redo, and a Render & Save / Download when you're finished.
#Sharing your media
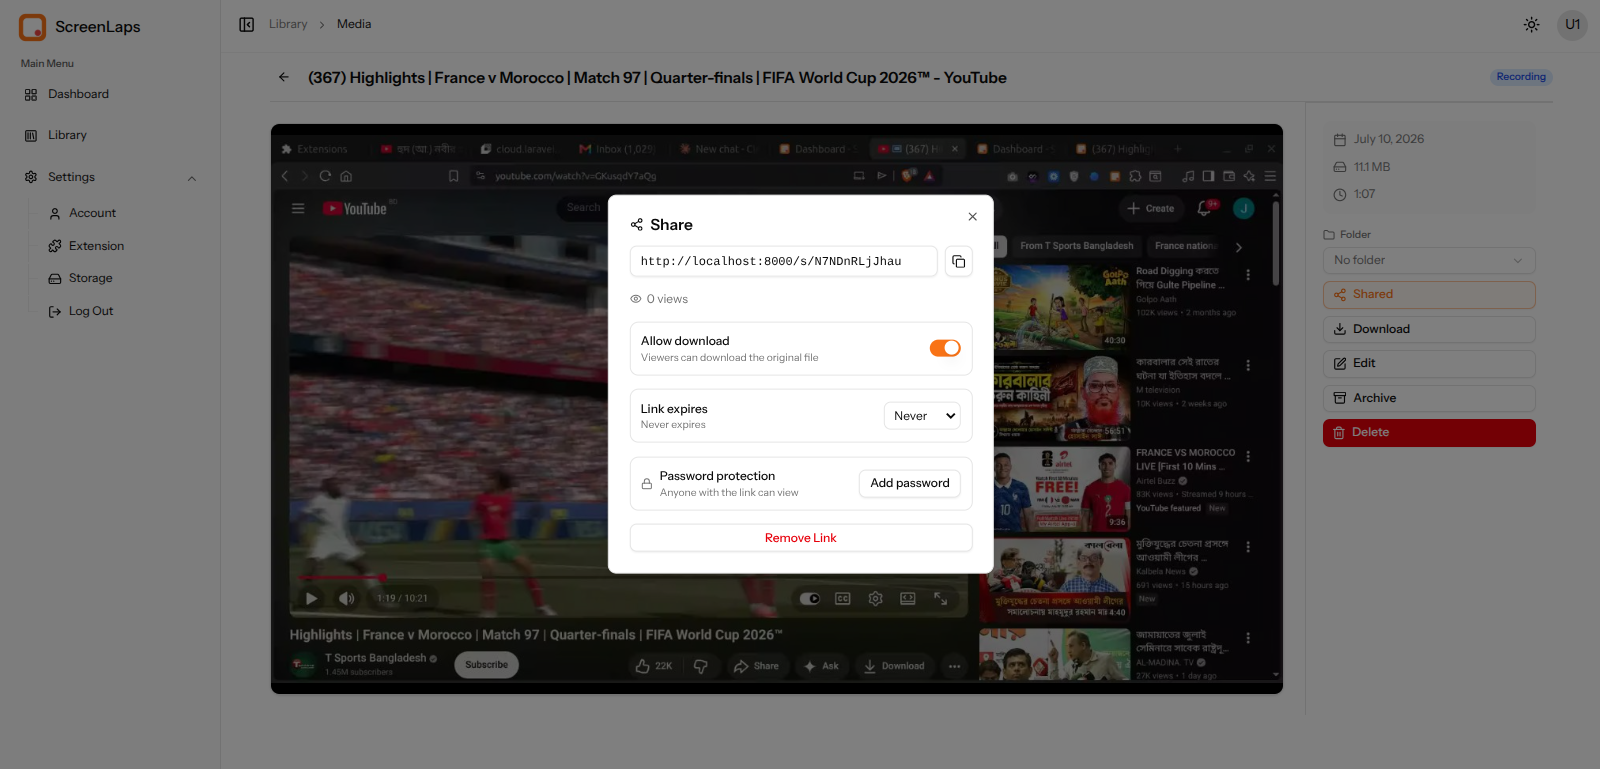
Open any item from the library and you land on its detail page, with the media front and center and an action sidebar: its date, duration, and size, the Folder it belongs to, plus Share, Download, Edit, Archive, and Delete.
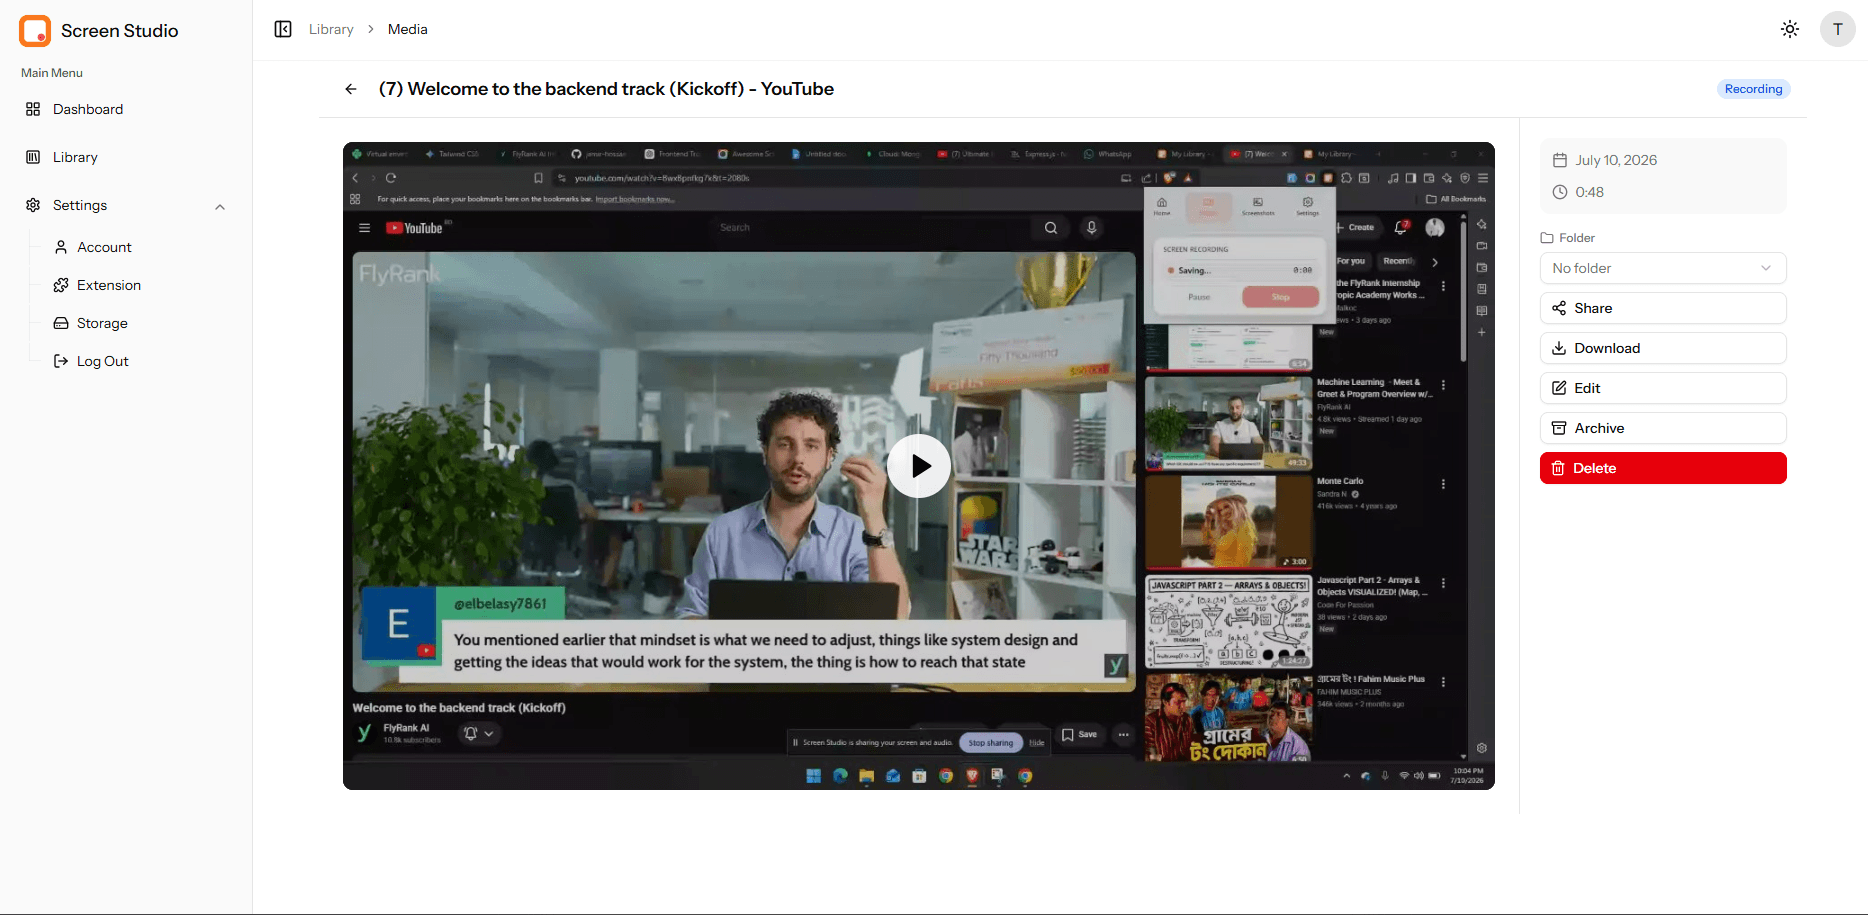
Click Share and ScreenLaps creates a link anyone can open. From the share dialog you can:
- Copy the shareable link and see how many views it has.
- Toggle Allow download so viewers can grab the original file.
- Set Link expiry — from Never to a fixed window.
- Add password protection, so only people with the password can view.
- Remove the link at any time to revoke access.
#Wrapping up
That's the whole platform: capture and record from the extension, organize everything in the Cloud Library (or keep it private in the Local Vault), polish images in the annotation editor and recordings in the video editor, and hand anyone a controlled, shareable link when you're ready. Install the extension, sign in, and make your first capture — everything else is a click away.
ScreenLaps Team
The people building ScreenLaps.